

samma
-
Content Count
89 -
Joined
-
Last visited
Posts posted by samma
-
-
I dont really like the text... the sig size isnt that good either, I think you might of blended the render in too much... the background is nice though
-
well like i said before... if the render doesnt take up around 1/2 the sig... the sig looks really empty, the best thing to do is use a small width

-
yeah... i know what you mean... its kinda crazy in abstract, but i kinda like it that way
-
the render is like way too contrasted... as with the background, the text doesnt really fit either.
-
Its defaults only... I used photoshop CS2, 2 Renders, and 2 fonts... (Arial + Vistor IIBK)... thats it
-
Probally my best... It was the same way I made my Angel Sig
 (2 renders )
-
lol well personally... I dont think the Robot sig's background does fit it... I actually think the angel one does >.< not sure why but the right side of the background looks awsome
 . Well at least theres someone who agree's on my render rule
 -
actually to be honest i used 2 renders in each sig...
for color and depth in the first one, and to make the background in the second . From experience... I kinda have a rule... if it doesnt fit around 1/2 of the background... the render sucks , IMO there is no such thing as a big render... a small one just makes the background look blank 
-
the robot render is from Unreal Tournament
, I dont really see how the renders too big in the second one though >.< -
-
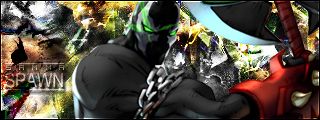
These are my enteries
Robot

Link :http://img.photobucket.com/albums/v476/samma383/Robot.jpg
AngelLink :http://img.photobucket.com/albums/v476/samma383/Angel.jpg
Good Luck All
-
thanks, btw people post your results
-
-
Im not sure if this has been done before... I havent seen a grunge abstract tut before, but anyways here it is
Outcome:
1. Fill the canvas with black, and brush with white using a grunge brush. After you have completely filled the whole layer with the grunge brush, go to Image > Adjustments > Auto Contrast, then go to Filter > Sharpen > Sharpen Edges, then finaly go to Edit > Fade Sharpen Edges and do an opacity of 50%. Make a new layer. Repeat Step 1. another 2 times using different grunge brushes.
2. Motion Blur All the layers appart from the bottom layer using these settings. Angle 0 - Distance 15.
3. Set the two top layers to soft light.
4. Make a new layer and fill the canvas with black. Get your best abstract brushes and brush with white. After you have completely filled the whole layer with the abstract brushes, go to Image > Adjustments > Auto Contrast, then go to Filter > Sharpen > Sharpen Edges, then finaly go to Edit > Fade Sharpen Edges and do an opacity of 75%.
5. Put the Abstract Layer below the two grunge layers set on soft light, and set the Abstract Layer to Hard Light.
6. If the Background is too dark, lower the opacity to 75/80%, if its still bad, a lower opacity won't really make it look good, so repeat Steps 5 and 6 using a different abstract brush set.
Optional. If you want depth in the sig, make a new layer above all the layers and click "D" to restore the colors to default, go to Filter > Render > Clouds, and set the layer to overlay, lower the opactiy to an appropiate setting.
7. Put your Render into the sig, resize it and put it to an appropiate position.
8. Duplicate the render and go to Filter > Blur > Motion Blur, with these settings, Angle 0 - Distance 40. Duplicate this layer about 2 more times and move it so it covers the whole sig. Merge the Render Motion Blurred Layers together and duplicate it again. Put one of the layers below all the layers and the other below the render.
9. Set the bottom grunge layer to overlay, and the top motion blurred layer (render) to overlay and move it where appropiate.
10. Make a new layer above all the layers and go to Image > Apply Image > OK. Then go to Filter > Sharpen > Sharpen.
11. Set that layer to overlay and put the opacity to 50%.
Optional. Get the Magic Wand tool and set it to 70/50/10 tolerance. Go down to one of your grunge layers and click randomly while holding shift (not too much though). Make a new layer below the render and fill with a scan line pattern (white). Set the layer to overlay.
12. Do your text and add a border.
Notice from mayank:Edited topic title. Remember to put the name of the program you are using, when posting tutorials -
yeah but if it was on the same y axis... the text would overlap his hair... think man
-
you mean X axis?
-
no actually that wasnt the effect i was trying to get... the dark side is kinda because of the purple of the render... i wish it wasnt there >.<
-
For all those that may argue that my sig has not been smudged... if you want ill send my PSD to a gfx mod cuz i smudged it lightly to enhance the background on overlay...
anyways this is my submission
-
well... i think this is easily my best sig... maybe anyways
R&C
-
its the PSD of the winner and the runner up of the avatar and the sig... how about you read SM's first post.
Notice from saint-michael:no flaming members on the forum. -
-
Avatar
Sig
I cant change it now... cuz ive already posted... but i kinda want feedback on it so i know what to expect
-
my entry
Ratchet and Clank Avatar
Ratchet and Clank Sig
-
try putting the scan lines under the render... and fix up your text...
Motion Sig after tutorial..
in Graphics, Design & Animation
Posted · Report reply
still... I cant believe people are still doing filter only motion blurred sigs... I mean personally im into defaults only using 2 renders...