Jump to content
xisto Community
Sign in to follow this  
Slay

Complete Signature Tutorial Adobe Photoshop 7+

Recommended Posts

Well here's my 3rd tutorial, it took about a hour and a half to make and I hope it helps people out. I use this technique in a lot of my signatures.


Easy Full Signature


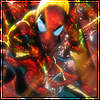
In this tutorial I will show you how to make a signature like this:


Posted Image


Resources used in this tutorial:

Dark Crystal Script Font

Rust and Grunge Brushes

Link Render


Brushing the background

1) Create a new canvas (I used 340x120)

2) Fill the background layer with black


Posted Image


3) Load your brushes

4) Set your foreground to white

5) Create a new layer (CTRL+Shift+N)

6) Brush the background white until it covers the whole canvas, just don't overlap to much


Posted Image


7) Create a new layer (CTRL+Shift+N)

8) Keep switching back and forth between black and white over the parts appropiate, (ex. if its to dark click once with white, if its to light click once with black over it)


Posted Image


9) Change the layer Fill Opacity

10) Merge the layers so its all in the background layer


Adding Color

11) Create a new layer (CTRL+Shift+N) and put it on top

12) Fill the layer with the color you want to use, I'm using #007236

13) Change the layer to Soft Light


Posted Image


14) Now to even out the signatures brightness and darkness out. If your signature is still really dark or really light in places, make a new layer (CTRL+Shift+N) above the background layer and repeat steps 8 and 9. Once you get it to look good, merge the layer down with the background.


Posted Image


15) You can merge all the layers now


Adding the render (Image)


16) Open the render you want in photoshop (You can find renders at http://planetrenders.net/ )

17) Drag the render onto the background you just made

18) Delete the background, preferbly using the magic wand tool


Before:


Posted Image


After:


Posted Image


19) Resize the render to the size you want by using Transform (CTRL+T) and drag the corners, press SHIFT while dragging to keep the image the same height and width


Modifying the render

20) Duplicate the render layer (CTRL+J)


Posted Image


21) With the bottom render layer selected, go to "Filter > Blur > Motion Blur" and put the settings at something around 36 for distance and you decide on the direction depending on where your render is. I used 29, click OK

22) Now some of the border may have been affected by the blur because all the background wasn't taken off, if so just delete the extra's


Before:


Posted Image


After:


Posted Image


23) Merge the 2 render layers (CTRL+E on the top render layer)

24) Change the render layer to Luminosity


Posted Image


25) If you need to move the render somewhere, do it now.

Note: You should have 2 layers now, 1 for the background and one for the render


Adding Text - Probaly the hardest part alone when making a singature

26) Select the text tool and click where you want your text to be, type in whatever you want

27) Edit the font and size for the text to whatever you want (I am using "Dark Crystal Script" and a font size of 32)


Posted Image


28) Double click the text layer to open the blending options setting

29) Here's the settings I used


Drop Shadow

Color Overlay

Stroke


30) Move the text if you don't like where it is


Adding a border

31) Reset the foreground and background (D)

32) Create a new layer (CTRL+Shift+N)

33) Press (CTRL+A)

34) Edit > Stroke, these settings


35) Same settings except a width of 2px and white as the color

36) Same settings except a width of 1px and black as the color

37) If you want, change the blending options to overlay or soft light (I left mine as normal for this one)


Saving

38) I'd save tfhe graphic as a PSD incase you need to change text or something

and / or

39) Save it as a .jpg and use the default Quality settings


Ending result:

Posted Image


This tutorial was made by Slay from A Knight's Tales ( http://forums.xisto.com/no_longer_exists/ ) and you are allowed to repost as long as you give me credit.


If you used this tutorial, please post your results, I'd like to see if this tutorial was worth making and if it helped people.

Share this post


Link to post
Share on other sites

This tutorial is good for thous who want to make simple sigs but dont know how so nice job for the tutorial :).. make them coming if it is alredy 3rd :P.. maybe try adding some cooler and harder to make stuff so it aint so simple sig in the end :P..

Share this post


Link to post
Share on other sites

@ Dawiss - Thanks, my intentions for this signature tutorial was for those people who are just starting out and hopefully this will also teach them some stuff about photoshop.@ Adobemedia - Glad you decided to try out my tutorial and posted your result. It looks pretty good, what's all part of the render? Just the wing on the left?@ tristan - Thanks for the compliment. <_<

Share this post


Link to post
Share on other sites

I really needed help on how to work with renders, thanks for this tutotial.Nice job and keep up the good work, know nay tuts which would make me learn about blending renders with the background?

Share this post


Link to post
Share on other sites

The tutorial is pretty good for learn how to work with renders, but i dont know how to apply the step #24, that thing of changing the layer to luminosity... can anyone tell me how to apply that thing? (yea im a newb)

Share this post


Link to post
Share on other sites

Thanks, and for blending...I'm not really sure, try Fire Designs on Invisionfree...they have a lot of good tutorials.And to answer your question MIGUE2k7, above the layers is the Blending options (Overlay, soft light, luminosity etc.) It's default setting is normal, just click on it and a drop-down should appear where you can select luminosity.

Share this post


Link to post
Share on other sites

Not bad, but I suggest NEVER merging your brushing layers. Also, it needs some depth, try doing a "brightness/contrast" layer, and set the contrast to ~30 and leave the brightness alone. Curves help to sometimes :D.

Share this post


Link to post
Share on other sites

@ Mjay06, thanks.@ KuBi, heh...I always merge my first few brush layers, lol. Hmm, I might try doing the curves and stuff if I make another tutorial sometime or if I feel ambitious enough to go and take a screenshot and add a curve to this one, lol. Anyways, thanks..I think. =/

Share this post


Link to post
Share on other sites

If you do use photoshop a lot. It is very usefull to go threw photoshops own help file and learn the basic shortcut keys as i have... just a few random examples... - alt+backspace = fill - ctrl+mouse click a layer = select all pixels in that layer - alt+mouse click between 2 layers = overlap A Layer, to make the effect of 1 layers pixels transparent to the above layer. transparrent pixels in affect then mask, making for example - see threw text. and tones of effects can be created just by changing the layers propertys. in the drop down tab were it says "normal" in the layer box... basic tip to use these is... - creat a new layer above the image - then do for example - use the 'gradient tool' and fill the entire layer with 1 side "50%gray" and the other "Black". - then change its layer propertys to example - 'overlay', or 'color dodge' - you can play with 'fill' / 'opacity' for intensity. - some effects use 50%gray as nutral(or transparent) and others use White. There are tones more basic stuff like that you can learn just from photoshops own help file. 1 more ill point out that may be usefull... using a 'Alpha channel'(aka a saved selection from photoshop's 'channels tab') as a filter in ImageReady when converting a image to .gif format(i dont rememeber witch other formats apply if any)... can be used to reduce the image output size for greater compression, sometimes with no visible loss of quality(respectivly speaking since gif is lossy). what the filter does is limit were u wont color sample for the format to be consentrated... Black space means it ignores that part, white space means it consentrates more color sampled from that part.. gray is everything in inbetween. - make 2 dots in diagonal, use retangle selection tool to select around both of them. - go /edit/define pattern - go to 'Channel tab' creat new channel - use 'fill tool' select 'pattern' fill channel with pater to make a checker box - then when you 'jump to image ready' u can select the alpha channel # in the gif box propertys were ever it is.

Share this post


Link to post
Share on other sites
Guest
This topic is now closed to further replies.
Sign in to follow this  

×
×
  • Create New...

Important Information

Terms of Use | Privacy Policy | Guidelines | We have placed cookies on your device to help make this website better. You can adjust your cookie settings, otherwise we'll assume you're okay to continue.